 |
| Spanish side by side .410 |
Time for some gunsmithing! A couple of weeks ago my buddy called me asking if I knew of any good gunsmiths in the area. He had a .410 side by side shotgun with a broken safety. When you loaded and cocked the gun, the safety would automatically set but only for one trigger. The other trigger was ready to fire and could not be put on safe. Unfortunately I didn't know any gunsmiths but I have a a fairly complete set of gunsmithing tools and I have done some firearm repairs before, so I offered to take a look at it.

The shotgun turned out to be a mystery. It was labeled "Jana-Denver, CO" but also said "Made in Spain"? A little searching on the web (especially at Shotgunworld.com) told me that Jana was an importer, now long out of business. They imported shotguns from a variety of manufacturers. But who made this one? It looked to be a pretty decent shotgun with lots of hand engraving on the metal, a color case hardened finish, and a nice walnut stock. Researching some proof marks on the barrel indicated that it was most likely made by Loyola. That wasn't much help since I couldn't find any information on Loyola shotguns or any parts diagrams. I've never been inside a shotgun before so I wasn't sure how I was going to disassemble this thing, let alone repair it without a decent parts diagram. I convinced myself "How hard could it be?" and started the disassembly.
 |
| hand engraving under the action |
Well, it turns out it was harder than I thought. No matter which screws I removed, I could not get the action out of the stock. Dejected, I put the shotgun aside. A day or two later I awoke at 3:00 AM and could not get back to sleep. The shotgun was haunting me. Refusing to admit defeat, I crawled down to the basement for a second attempt. I found the answer by accident. As I was manipulating the action the trigger guard moved. For a second, I thought I had broken the weld on the trigger guard. Then I realized the end of the trigger guard was actually threaded into the action. I spun the trigger guard off, removed one more screw that was hidden under the trigger guard, and voila! The action came apart and off the stock.
 |
| the mysterious threaded trigger guard |
The safety problem was ridiculously simple. Each trigger is a lever. The safety is simply a bar that slides over the top of the levers to block any upward movement. The bar is a screw. Somehow the screw had backed itself out and was only blocking one trigger lever. I pulled out the screw, cleaned it, and screwed it back in with a little Loctite until it blocked both levers. So about 2 hours of work trying to get the action off, and 2 minutes to fix the broken safety.
 |
| safety screw |
 |
| safe and fire positions over the triggers |
With that problem solved, I noticed the recoil pad was dry rotted and starting to crumble. I needed more of a challenge since the safety problem was too easy of a fix. So with an OK from my buddy I figured I would attempt to fit my first recoil pad. Obviously I couldn't order a direct replacement for this uncommon shotgun. I measured the original recoil pad and looked for a replacement. The stock is relatively small and narrow so I ordered the smallest recoil pad I could find from Pachmayr. The website had a pretty good set of instructions on how to properly fit their pads. It sounded like something I could handle.
 |
| original rotten recoil pad |
First I carefully removed the old pad. That was no simple task as the screws were hidden beneath the pad and it was glued on as well. Luckily I managed to get the old one off without damaging the stock. Next, I filled the old screw holes. I drilled them out a little, glued bamboo skewers in the holes, and cut them flush. To prep the recoil pad for screws, I used a transfer punch inserted from the back of the pad to make a dimple in the center of the screw hole on the face of the pad. I used an x-acto knife to carefully slice between the horizontal ridges on the face of the pad where the dimple was, and pushed the punch through. I oiled the screws before inserting them into the pad. The screws disappeared beneath the pad without a trace. Then I carefully lined up the pad, marked the locations for the new holes, and drilled.
 |
| old screw holes filled |
 |
| new holes drilled |
Next I temporarily attached the recoil pad and scribed the outline of the stock on the back of the pad with an x-acto knife. There was a fair amount of extra material and I doubted if I could take it down to size without it looking like I butchered it.
 |
| pad marked for grinding |
Then I removed the pad and sanded off the bulk of the material on my stationary belt sander with an 80 grit belt. The brown part of the pad looked and smelled a lot like pencil erasers as I ground it down. Next I used 120 grit paper on my stationary disk sander to take the pad just shy of the stock marks. The grinding went fairly quickly and I noticed the finish on the pad looked pretty good after a pass with the 120 grit. I was feeling pretty confident at this point.
 |
| after rough grinding |
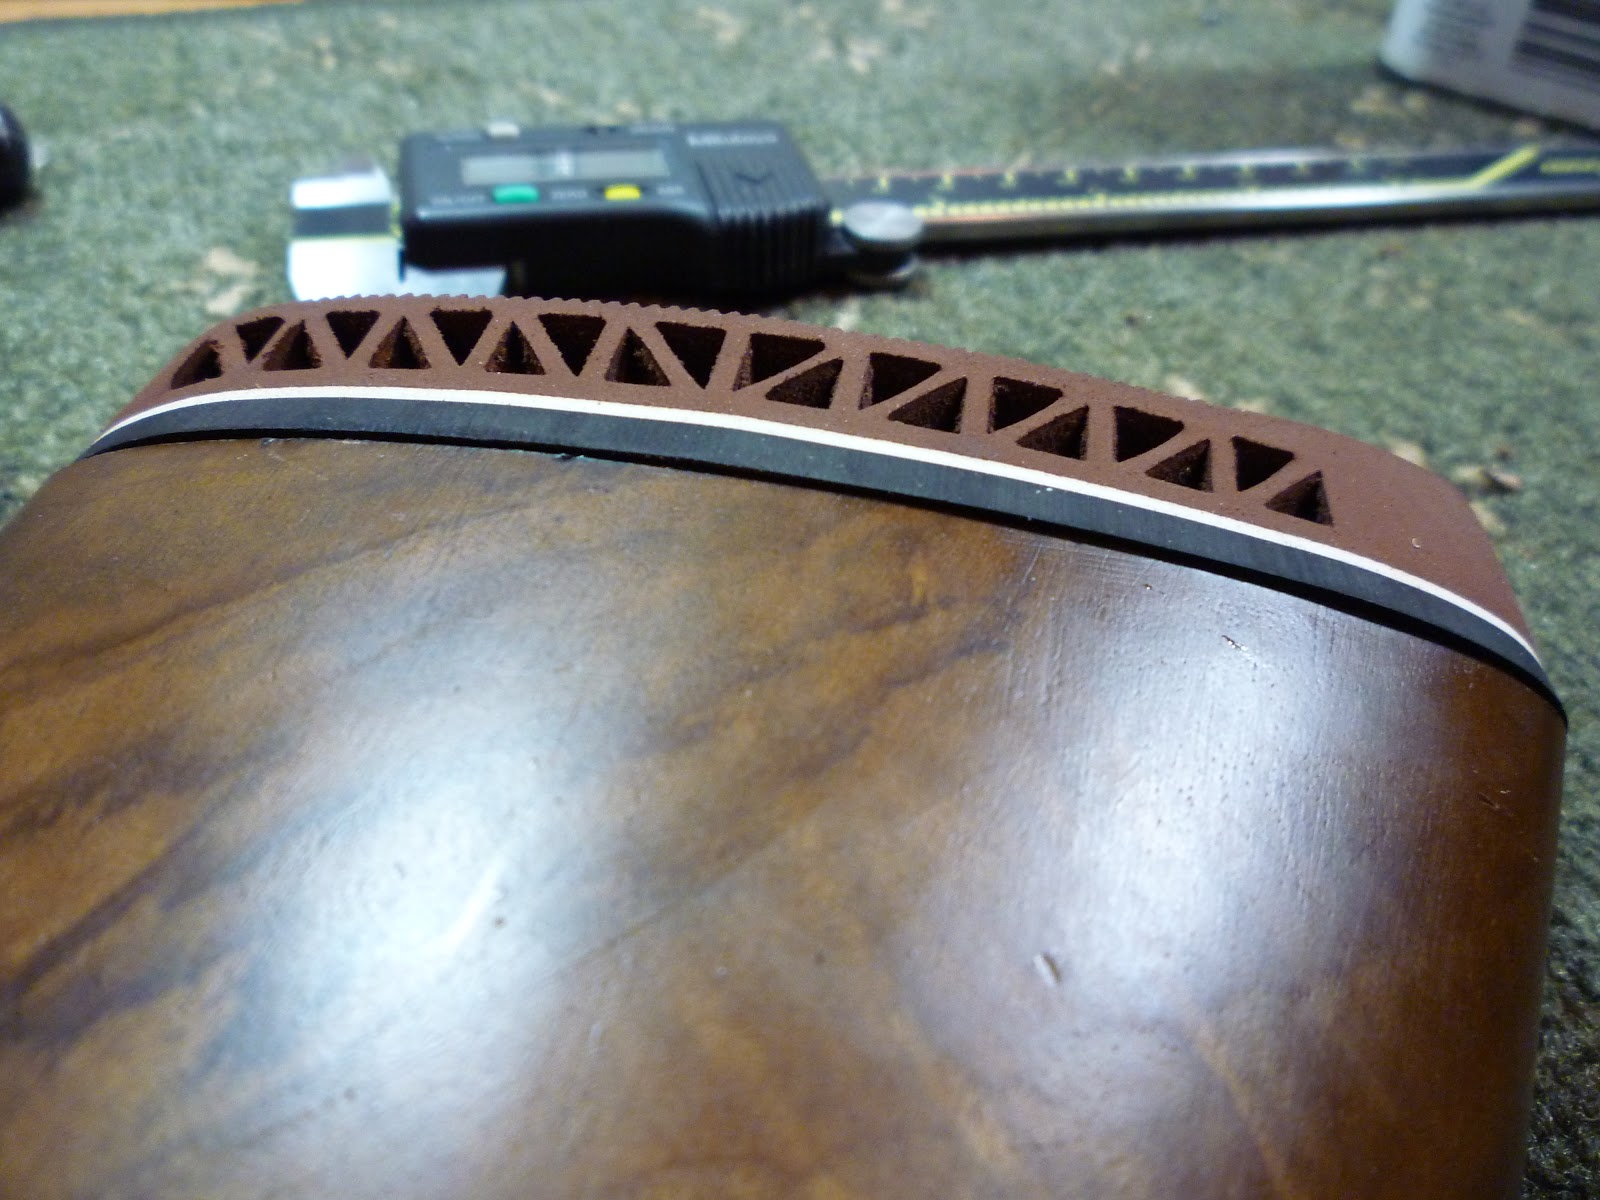
I screwed the pad back on to the stock for the last time. Then I wrapped the end of the stock in a layer of painters tape to protect the finish. I had maybe 1/32" of material left to remove. I hand sanded with 150 grit paper wrapped around a block of aluminum until I started to sand the tape. Finally, I finished up with 320 grit wet/dry paper lubricated with a few drops of kerosene. One last wipe with kerosene to clean the pad and I was done.
 |
| after final hand sanding |

My one mistake was not following the angle of the stock on the toe of the recoil pad. I squared mine off. It doesn't look bad, I just think and angled toe would have looked more professional. Oh well, live and learn. Overall I am extremely happy with the results. Much easier than I expected and you really can't tell that I ground the pad down. It looks as if it was made that size from the start. I actually impressed myself with this job!
 |
| look ma, no screws! |
 |
| a job well done |
No comments:
Post a Comment