Sunday, June 24, 2012

Motorized Bicycle - Epilogue


I finished the bike just a few days before Scarlett Fever.  With all of the construction done, the only thing left was to take a test ride.  I was extremely nervous because up to this point I had no idea if the motor even worked!  I dreaded the thought of the endless hours of troubleshooting that would ensue if the motor didn't start.  Anxiously I positioned myself on the bike at the top of my steep driveway, started coasting down, popped the clutch, and...nothing!  OK, it was just one try, but my confidence was starting to sink.  Then I realized, I had never opened the fuel petcock!  So i opened up the petcock and tried again.  By the time I reached the bottom of my driveway, the bike sputtered to life and I was off.  The project was a success!

The small engine warmed up quickly and I could open the choke before I even reached the end of the block.  The bike cruised along easily, topping out at around 25 mph?  I spent the next couple of days riding the bike breaking in the motor, working out the kinks, and making some final adjustments.  It was way too much fun.  It was going to be hard to see this one go come raffle time.

at the local cruise night
To promote the show, I rode the bike down to the local cruise night.  It was amazing how many people crowded around the bike to get a closer look.  All included, the project cost about $900; most of that from the bicycle ($620).  We could have built something similar for much cheaper, but the styling of the Felt 1903 really made the project.  Most people thought it was a restored antique, not a new bicycle.  The extra money was well worth it.  Finally I posted a video on YouTube and Facebook to generate interest (see below).  People flipped over the look of the bike.

at the show

The day of the show we parked the bike on the street in Hoboken.  Once again, we got lots of interest from people passing by.  As part of the show we had several famous pinstripers on hand doing custom work all day long.  Glen Weisgerber was kind enough to letter "Scarlett Fever" on the bike to commemorate the show.  It was mystifying to see him do the whole thing in single brush strokes; true talent.  We sold a ton of raffle tickets all day long and finally raffled it off around 11 PM.  The poor soul with the first winning ticket must have left because we had to pull a second ticket.  The winner was one of the guys from another local car club.  I was sad to see the bike go but it was nice to know it went to another car guy who is going to appreciate it.

lettering the bike

amazing work by Glen

This project was so much fun, I'm thinking of building a second one for myself.  Of course, I'll have to go bigger, better, and faster.  Hmmm?  I have a 200cc motor just waiting to be put to good use...  Finally, I'll end this with the video I made to prove to everyone that the bike actually works and get people psyched about the bike.  Enjoy.


Saturday, June 23, 2012

Motorized Bicycle - Other Parts

Exhaust
The oversized front motor mount hit the muffler.  A ball pein hammer gently massaged the muffler into submission.  The heat shield on the muffler hit the pedal so that was removed as well.  If I wasn't on a budget, I would have purchased an aftermarket muffler that fit better.

muffler

Wiring
The wiring is pretty easy.  The kill switch, motor, and coil are all wired together through push connectors.  The push connectors looked pretty cheap and I didn't trust them to stay together.  So I crimped the wires together and covered everything in heat-shrink tubing.  The wires from the kill switch were zip-tied to the down tube.  Note: the threaded cap must be removed from the spark plug for the spark plug wire to fit.  Also, the coil mounting bracket is pretty flimsy.  I used some other unused steel bracket from the kit to mount the coil.

coil
Clutch
The clutch control clamps easily to the left side of the handlebar.  The hard part is getting the clutch cable pulled tight against the clutch control arm against spring pressure.  Make sure the brass ferule that secures the clutch cable is really tight or the cable will slip.  From the factory, the clutch was set so tight that I thought it was broken.  Luckily it is easy enough to adjust following the directions in the manual.  After some trial and error, I had the clutch tension set correctly.

clutch handle


Throttle and Choke
I really liked the look of the handlebar grips that came with the bike.  Of course the grip that comes on the throttle assembly did not match.  I had to slice the throttle grip to remove it from the throttle.  Then with a little shaving of the bicycle grip, I was able to install it over the throttle assembly.  The choke clamps right onto the handlebar.  The throttle, choke, and clutch cables were all secured to the frame with insulated wire clamps for a clean look.  I drilled and tapped the frame to mount the wire clamps.

throttle and choke

wire clamp


Chain
The kit includes a master link which allows you to remove the chain without a chain tool.  The master link is junk, do not use it.  It broke on one of my first rides.  Invest in a chain tool and adjust the chain length by adding or removing actual chain links.  Due to the large tires and fenders, the chain hit the rear fender.  I bent the rear fender in a vise for clearance.

bent fender (it looks worse in the picture than it is)

Engine Case
The engine case comes with a lot of flash from the casting process.  I removed the flash with a hand file.  A few minutes of work really helps to clean up the engine, especially on the cylinder.

Motorized Bicycle - Fuel Tank

hand made fuel tank
The motor kit comes with a 2.5L peanut style gas tank.  It doesn't look too bad on a standard bike, but it wouldn't have worked on this frame.  Not only was the styling off, but it would never have fit the top tube of the frame without looking like a metal wart.  I needed another solution.

stock peanut tank

As it turns out, the top tube of the bike frame is hollow and can be used as fuel tank.  There are several videos and forum posts that describe the process.  Basically you disassemble the frame, drill a hole on the top of the tube, plug up some holes inside the tube, epoxy on a fuel cap assembly, and seal the tank.  The result is a really clean and authentic looking tank.  Unfortunately, time and money prevented us from going that route.  Instead, I decided to mount a Moon style tank under the rear seat.  All of the suitable commercial tanks that I could find were way too expensive.  Luckily my friend and fellow Road Lord, Jesse from KNS Customs volunteered to build a tank for the bike.  I gave him the dimensions and he went to work.  A short while later, I had the tank in hand.

To mount the tank I inserted two 1/4"-20 threaded rivets in the seat stay bridge.  Then I bolted on a length of 1" aluminum angle where the rear fender meets the bridge.  A pair of stainless hose clamps secured the tank to the base.


tank mount

With the tank mounted I marked a spot to mount the petcock.  I thought I could just drill and tap the tank for the petcock but the tank wall was too thin to thread and the valve arm of the petcock hit the tank when installed.  So I made an aluminum threaded bung on my lathe.  My friend Steve from the club TIG welded the bung to the tank.  With the fabrication on the tank finished, I smoothed out the welds on my belt sander and blasted the tank to give it a nice brushed look that matched the engine.  I placed a rubber shim between the fender and tank to keep things quiet and protect the paint.  Finally, the tank needs to be vented so I drilled a 1/8" hole in the gas cap.


fuel petcock

The petcock has a fuel filter built in but the screen looked a little course.  So I added a second one in the fuel line just in case.  The hose clamps that came with the kit were crap; they split soon after I installed them.  So I replaced them with adjustable hose clamps.


fuel filter
The finished tank really complements the look of the bike.  The capacity is right around 2.5L, same as the stock tank.  With the way the motor sips fuel, that's enough gas for hours of riding.


Friday, June 22, 2012

Motorized Bicycle - Mounting the Motor


This should have been the easiest part of the build.  The motor is designed to bolt right into a standard bicycle frame.  However, I didn't choose a standard bicycle.  The reason the Felt 1903 looks so cool is because of its unique styling.  That unique styling means that nothing in the motor kit fits out of the box.

The motor mounts to the frame by two bolt-on clamps that attach to the seat tube and the down tube.  There were two problems with mounting the motor in this frame.  First, the front mount was too small to fit the large diameter of the down tube.  Second, the spacing between the two frame tubes was too great for the motor, I needed spacers to bridge the gap.  Spacers were included with the kit but they were too small.  I needed to make my own.  And the kit also came with alternative mounting brackets for large tube frames but they were completely jury rigged.  I just couldn't use them, so I had to make a new front mount as well.

The front motor mount studs on the engine were placed too close together to clear the down tube.  So the first step was moving the studs.  I needed to fill the old bolt holes in the engine case and then drill and tap new holes spaced properly for my frame.  I tried filling the holes with Alumiweld but I guess I couldn't get the engine case hot enough.  So instead I made some 10mm threaded aluminum rod on my lathe to fill the holes. Then I torqued the rod in the old bolt holes with some red Loctite.  Now with the old bolt holes filled solid with aluminum, I could easily drill and tap the new holes partially on top of the old holes without any loss of strength.

threading aluminum rod

studs secured in case
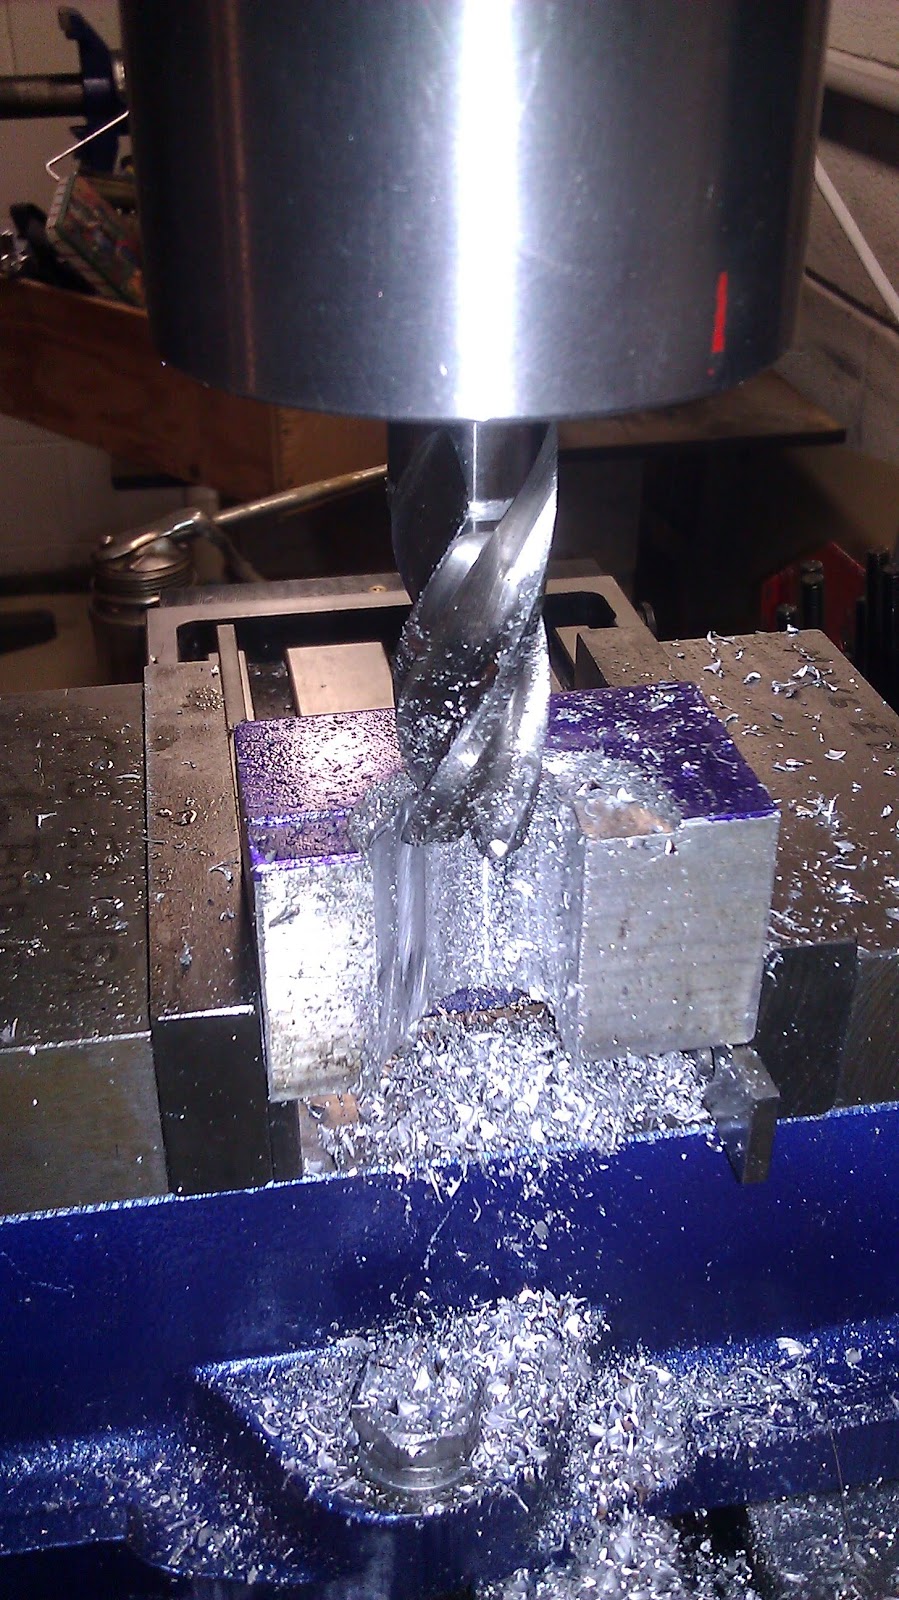
With the bolt holes for the front mount in the right location, I needed a new motor mount cap to fit the down tube.  The radius on the old cap was just too small.  So I started with another hunk of aluminum and squared it up in the mill.  Then I rough cut the proper radius.  I removed the machining marks in the radius with a sanding drum mounted in a pneumatic die grinder.  After drilling some countersunk holes for the mounting bolts, I chamfered the edges on the mill and cleaned it all up in the blast cabinet.

milling the cap
checking the fit
Old cap vs. new.  Overkill?
With the mounts prepared, I still needed to make up about a 2.5" gap on each side of the motor.  I thought of making the mounts out of aluminum but that would have taken a while.  I considered making mounts out of HDPE plastic but it is really expensive.  So I figured I would make the spacers out of hard rubber.  But where could I find a large block of hard rubber?  Harbor Freight to the rescue!  I purchased a solid rubber wheel chock from HF as my source of raw material.

wheel chock
I used a hand saw to cut the block into a slab of the proper thickness.  After carefully measuring and marking, I cut the mounts out on my scroll saw.  I used brad point drills to drill perfect holes in the rubber for the mounting bolts.  The edges were chamfered on my belt sander.

front spacer being but
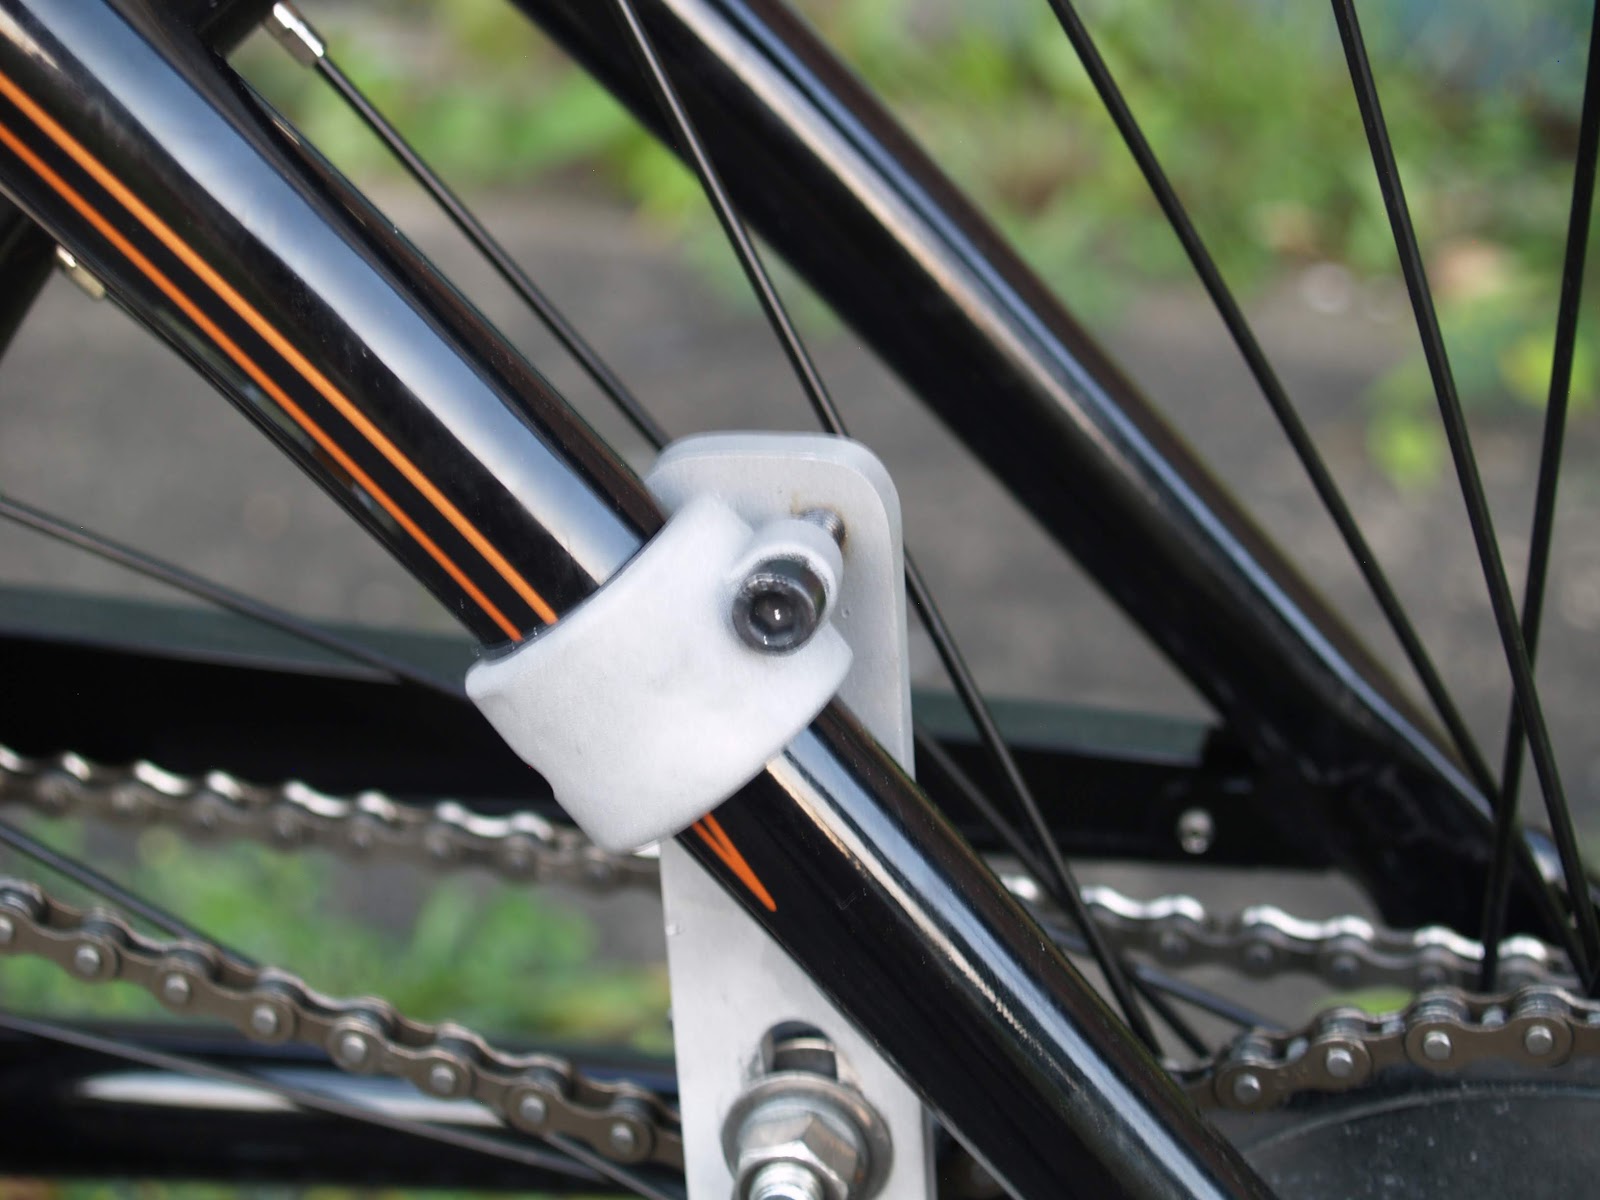
rear spacer in place
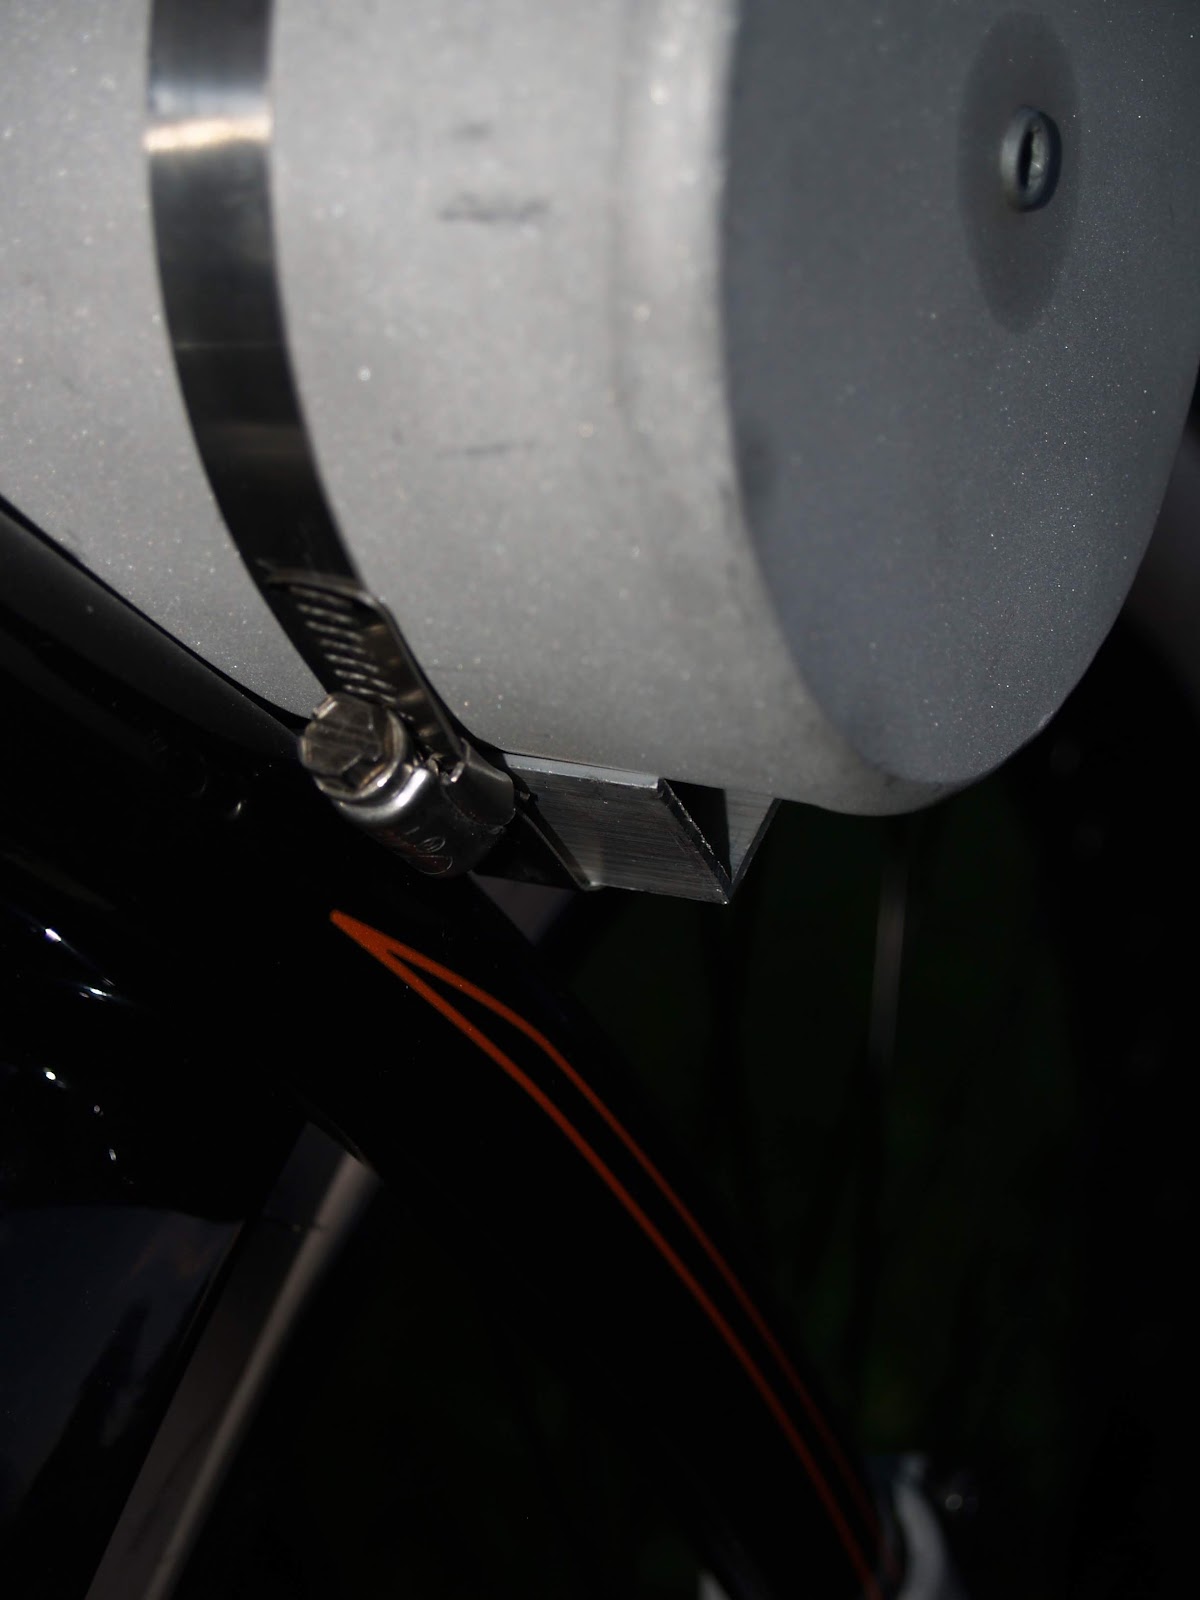
The spacers and new mounts worked great.  The motor is mounted solidly and the rubber helps to dampen vibrations.  I had to order extra long 10 mm stainless socket head bolts for the mounts.  I also placed a thin strip of rubber under the mounts to protect the paint.

front mount
rear mount


Motorized Bicycle - Chain Tensioner

custom chain tensioner

If you are very lucky, when you mount the motor you will be able to adjust the chain length perfectly so that both the pedal chain and the motor chain are taught without any need for a chain tensioner.  Chances are, you won't be that lucky.  I needed a chain tensioner to keep from throwing the motor chain.  Unfortunately, the chain tensioner that came with the motor kit was the ugliest monstrosity I had ever seen.  If I was Grubee I would be embarrassed to include it with the motor kit.

stock chain tensioner

before finishing

First, the stock unit would not have fit the oversized chainstay anyway.  Second, I'm pretty sure the plastic wheel would have been quickly chewed to bits by the moving chain.  There are aftermarket solutions which are much more elegant, but again they cost a lot.  So I decided to make my own.  I started with a length of 3/16" x 1" aluminum bar stock cut to length.  Then I milled a 3/8" slot for an idler sprocket where the bracket met the chain.  I drilled and tapped the bottom of the bar to mount to the hub-brake mount.  To mount the top of the bracket, I drilled and tapped again and used one of the motor mount caps to secure it to the seat stay.

lower mounting


repurposed motor mount for top mounting

Surprisingly, the hardest part was finding an appropriate idler sprocket.  Most of the ones I could find were way too large.  I finally found a 10 tooth sprocket on Amazon that was a replacement part for a lawnmower.  It worked perfectly but I had to grind down the bolt head a little to clear the spokes.  When it was all finished I threw it in the blast cabinet to give it a brushed look that matched the motor.  The new tensioner is rock solid, easy to adjust, and only cost about $10.

idler sprocket


Motorized Bicycle - Attaching the Sprocket

motor sprocket

Here's a bit of a warning for anyone wanting to attempt this on their own.  The manual states that you may have to open up the diameter of the hole in the center of the sprocket to clear your hub.  The hole needs to be perfectly centered or your sprocket will run out of true and you will throw your chain.  The manual recommends taking it to a machine shop and having the work done on an engine lathe.  Good advice, but they should do a better job of making people aware of this before they purchase the kit.  Of course, the sprocket didn't fit over my hub.  Luckily I am equipped to deal with this, but unless you have access to machine tools, you may need to plan accordingly.

I ended up securing the sprocket on my mill with some hold-downs and using a fly cutter to open up the hub hole about 1/16".  Two heavy rubber gaskets (I think they are just pieces of old car tires) go on either sides of the spokes and then the sprocket is bolted through the spokes to some metal plates.  The rubber gaskets were warped which made lining everything up evenly very difficult.  I torqued down the bolts and left them overnight to let the gaskets settle.  The next day I loosened the sprocket and carefully centered the sprocket over the hub.  I gradually tightened all of the bolts (several times, as the sprocket kept shifting), then loosened one at a time and added blue Loctite to keep them from coming loose.  A quick spin of the wheel confirmed that everything was centered.  This was one of those steps that looked like it should take 15 minutes but ended up taking a few hours.  Several companies make sprocket adapters for these motors that make attaching the sprocket much easier.  Of course they cost more but it may be worth it just to save on time and frustration.

front view

rear view

Motorized Bicycle - Index

completed motorized bicycle

Every year my car club The Road Lords, puts on Scarlett Fever.  Scarlett Fever is a benefit car show/concert/art auction for our girl Scarlett who is battling Rett Syndrome.  During the show we raffle off items to help raise funds for Scarlett's medical expenses.  This year, I offered to build a motorized bicycle for the raffle.  I have always wanted to build a motorized bicycle but it wasn't until I saw an article in Make magazine that I realized there were relatively inexpensive kits available that should make it a pretty easy process.  I really couldn't justify building one for myself, but the raffle gave me the perfect excuse.  Now I could satisfy my urge to build and ride one without incurring the expense or worrying about storing it in my overcrowded garage afterwards.

1903 by Felt

I could have used any bike but I have been enamored by the Felt cruisers ever since I first saw them.  They aren't cheap, but they are built with quality parts and the styling can't be beat.  Their 1903 was just begging for a motor!  With the springer front fork, large leather seat, huge top tube, pinstriping, and fat white tires, it looked like one of the early Harley's.  I was fortunate to find one locally at Cags Cycles.

Grubee Skyhawk motor kit
With the bicycle picked out, I needed a motor.  Their are dozens of places online that sell chinese motor kits that include everything you need to add a motor to your bicycle.  After researching some online forums I placed an order for a 66cc Grubee Skyhawk kit from Gasbike.net.  Ordering anything cheap from China is always a crapshoot but this kit got pretty good reviews online.  It arrived a few days later packaged in typical fashion; slopped in grease, wrapped in used bubble wrap, and litterally thrown into a box.  Despite that, everything arrived in one piece and without any missing parts.  The manual is a bunch of faded photocopies written in Chinglish so you better have some idea of what you are doing before you start.

Just a word or warning.  IF you have a bicycle with standard geometry the motor kit could install in a few hours by anyone with moderate mechanical skills.  But because of the unique styling of the Felt 1903, nothing fit out of the box.  There was a significant amount of machining involved to get the motor to work with bike.  This motor, with this bike, is not a project for a beginner.  There is a lot to this build, so I have broken it up into parts.  Click on the links below to view the build.

Part I - Mounting the Motor
Part II - Attaching the Sprocket
Part III - Chain Tensioner
Part IV - Fuel Tank
Part V - Other Parts
Part VI - Epilogue