The new hexacopter I am building will feature three
8000 mAh 6S Thunder Power batteries. That's over $1,700 per set, and I plan on having two sets! Now with that much capacity, my
Accucel 6 would take forever to charge them. And there is no way I am trusting $1,700 of batteries to a $23 charger. Time to step up my charging game. I figure Thunder Power must know how to charge their own batteries, so I selected their top of the line charger the
1430C. It is capable of charging at a whopping 1000 watts!
 |
| Thunder Power 1430C |
But to charge at that rate, you need a big power supply. I chose the
1200 watt EFuel power supply. It's good for 50 amps at 24 volts. With that combination I should be able to charge a set of three batteries in parallel in about 30 minutes.
 |
| EFuel 1200 watt power supply |
Now the charger and power supply are not delicate pieces of equipment. But I would like to mount them inside a case for easy transport. Also I would like to wire everything up once to reduce wear and tear on the connectors and minimize the chance of wiring something incorrectly. I have this old equipment case that will fit everything nicely. However am worried about the air circulation. This stuff is likely to get very warm and I don't want to recirculate hot air into the equipment. The best option is to mount everything onto a removable platform that will fit inside of the case for storage.
 |
| case for the charging system |
I found an old street sign in my pile of materials. I decided to bend it to fit the case. The bent ends will serve as legs to allow for storage underneath the platform. I tried to bend the sheet with my
Harbor Freight bending brake. I knew the brake wasn't rated for stock that thick but I figured I'd give it a try anyway. Not a chance; the sheet wouldn't even budge. So I clamped the sign to my
steel bench and resorted to a 5 lbs mallet to "gently ease" it into shape. Once bent to shape I trimmed the legs to bring the top to a height of 2 inches.
 |
| bad day to be a street sign |
Next I disassembled the charger and power supply so I could punch mounting holes in them. I guess I could have just zip tied them to the platform but I wanted a cleaner look than that. I carefully chose the locations so that the screws would fit without touching any electrical contacts. I then laid out the units on the platform, marked the mounting holes, and drilled the platform.
 |
| holes punched in bases |
 |
| sign bent and ready to mount parts |
Both units were held in place with 8-32 screws. The power supply mounted easily. I bolted down the base and then reassembled the unit. The charger was a little more difficult. Because the sides of the unit also act as the feet, I couldn't tighten down the charger until the unit was first reassembled. So I put toothed lock washers under the screw heads so that I could tighten the nuts without access to the screw heads.
 |
| PSU and charger mounted to base |
I decided to add a handle to make it easier to remove from the case. I found a piece of aluminum bar and hand-bent it into shape in a vise. The middle was sagging a little from the weight so screwed the handle into wooden blocks underneath the base.
 |
| handle |
 |
| wooden blocks for support |
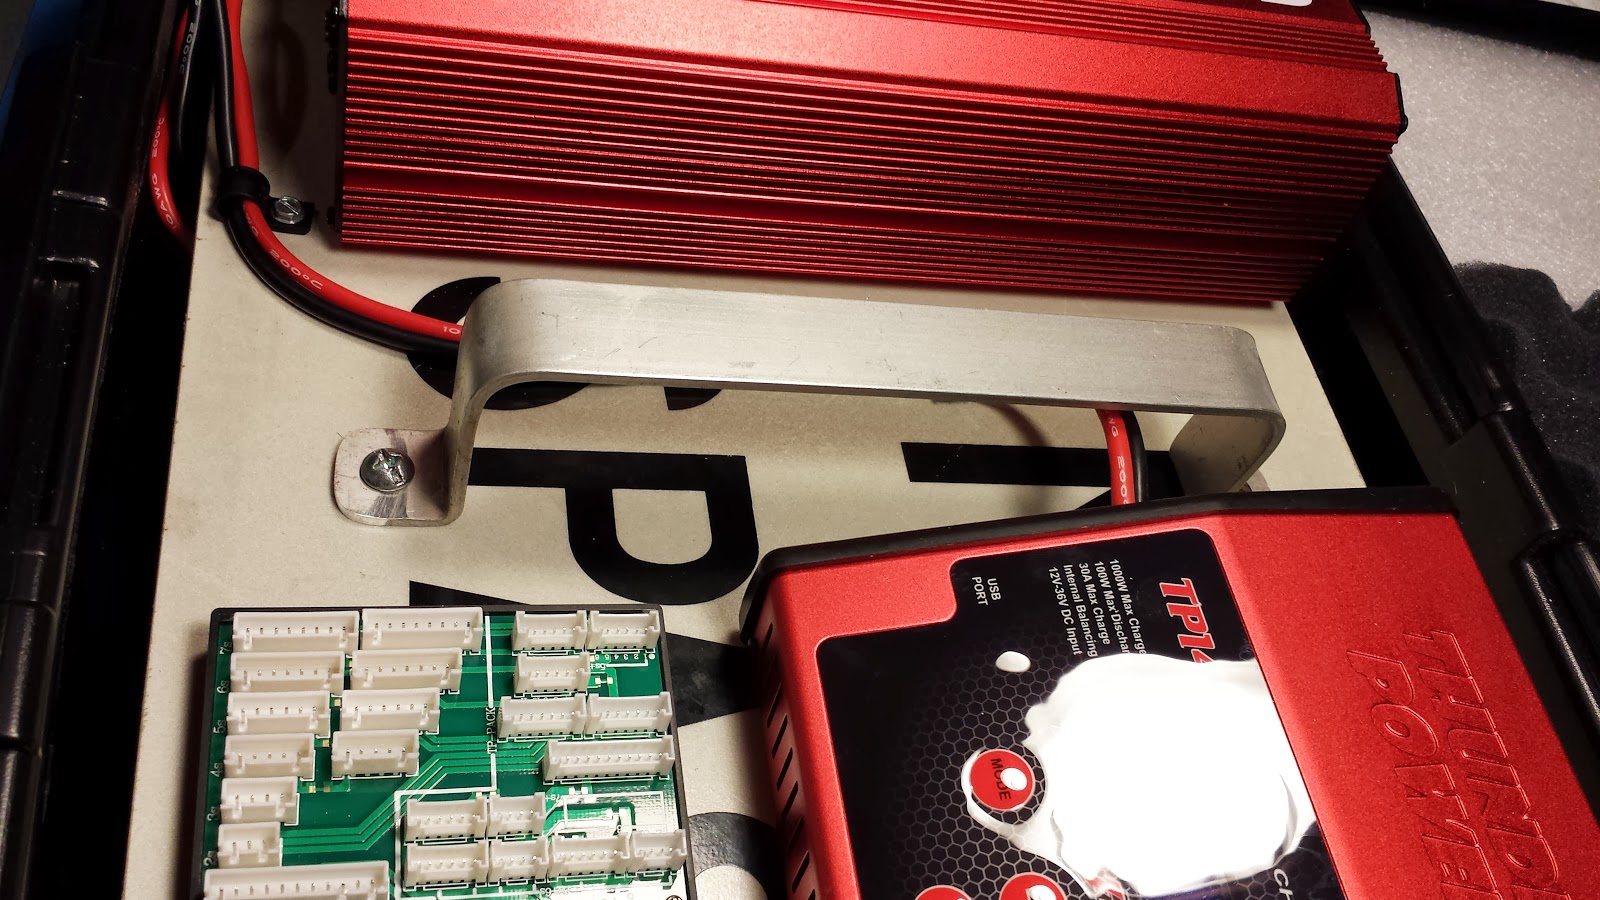
Next I needed to wire the charger to the power supply. I could have just inserted the banana plugs into the binding posts. But I wanted something a bit more permanent. So I soldered some gold plated ring terminals to the charger wires and clamped them down in the binding posts. Then I secured the wires to the base with cable clamps. No need to worry about the wires coming out or someone hooking things up incorrectly.
 |
| ring terminals for binding posts |
The charging system fits perfectly in the case. Now it is nice and easy to transport which helps considering the system is pretty heavy. A premium storage solution for a premium charging system. I feel much better now knowing this $430 system is properly protected.
 |
| completed charging system |


No comments:
Post a Comment