 |
| LED next to the "Y" in "SKY" |
Friday, December 23, 2011
FlySky FS-TH9X LED mod


Tuesday, December 20, 2011
FlySky FS-TH9X Antenna Mod
 |
| FlySky radio, note antenna on top |
 |
| stock TX module |
 |
| TX removed, note cut wire in upper right |
I started by pulling the TX out and cutting the coax wire. Then I opened the radio case and removed the antenna. I also opened up the TX case and desoldered the two tiny leads of the coax wire and removed the cut piece of wire.
 |
| one screw holds antenna |
 |
| coax wire inside TX |
The next step was to figure out how to securely mount the antenna on the TX case. I searched my shop and found a fiberglass tube from an old umbrella that fit the inside diameter (9/16") of the antenna base perfectly (and my wife wonders why I keep all of this "junk"). I cut a piece 1 5/16" long, shoved it inside the antenna base and used the stock screw on the antenna to hold it together.
 |
| antenna and tube |
Next I drilled two holes through the TX cover and into the fiberglass tube for mounting screws. One more hole was drilled in the TX cover to feed the wire through.
 |
| cover and antenna drilled |
 |
| antenna mounted |
 |
| clearance washers |
 |
| rear view |
To make the installation even more secure, I globbed some PC7 (man's best friend) around the antenna mount and onto the TX cover. I let it set for 24 hours.
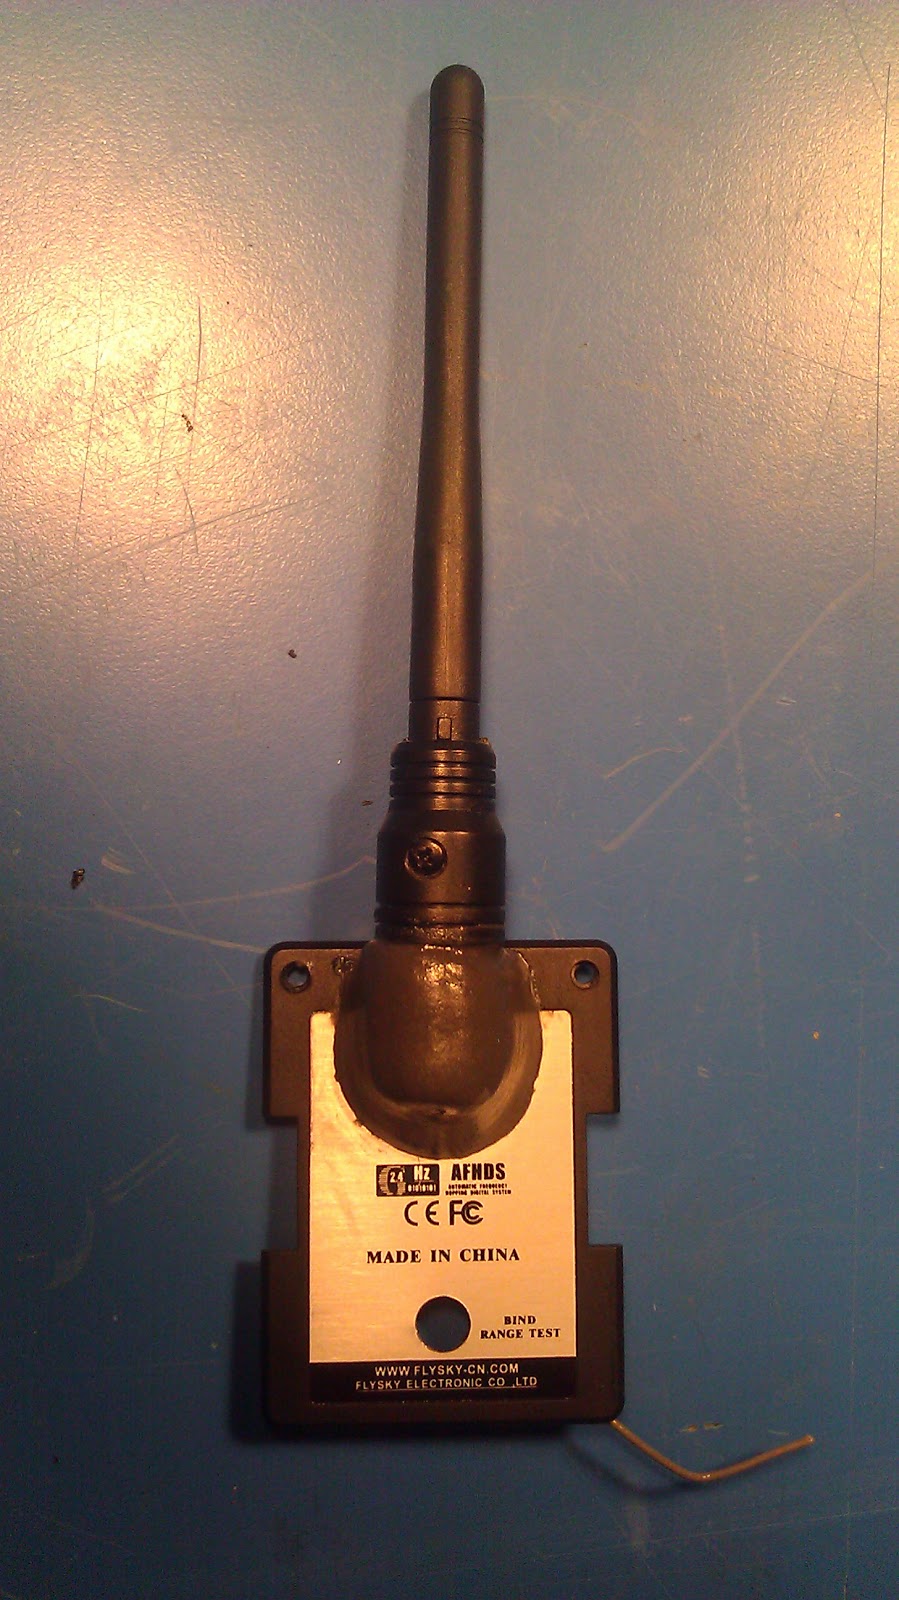 |
| PC7 epoxy |
The next step was to solder the coax wire back the TX circuit board. For those that are not familiar with coax wire; there is a single lead through the center of the wire surrounded by a plastic tube. Around the plastic tube is a woven metal sleeve of wire as a shield. That is then covered with typical wire coating. As you can probably tell from the pictures, the wire is tiny. Stripping and separating the two wires was difficult, even for my favorite stripper! I ended up cutting the plastic tube off the center wire with an X-Acto and a jewelers loupe. Both leads then needed to be soldered to two tiny pads on the circuit board that were about 2 mm apart. Actually, the stripping was a lot harder than the soldering. I added a little hot glue to the wire to relieve any tension on the solder joints.
 |
| coax wire soldered back on |
 |
| ready to assemble |
 |
| finished and installed |
Monday, December 19, 2011
FlySky FS-TH9X Simulator/Resistor Mod
|
| transmitter module on back or radio |
Of course, it didn't work. Neither my computer, nor the AeroSim program recognized my radio controller. After some online searching, I discovered that because of a design flaw in the radio (what do you expect from a $60 radio) the flight simulator port will not work unless you unplug the transmitter module. So I unplugged the transmitter module and it worked with the software! No big deal, right? Almost. Turns out that although the transmitter can be removed from the radio case, it is still hard-wired to the antenna. So even though the module is unplugged, it dangles off the back of the radio by a very small wire. Not only do you risk breaking the wire that way, but every time you plug the module back in you risk pinching the wire. I could see that sooner or later that wire was probably going to give out. After some more online research I found a solution. If you add a resistor to one of the circuit boards, the radio will work with the simulator software without removing the transmitter module.
 |
| circuit board on back of radio case |
 |
| close-up of circuit board |
 |
| circuit trace cut |
You need to cut the trace before you add the resistor. Check the picture above to see where to make the cut. Use a razor blade to cut through the trace then scrape out the copper between the cuts to make sure the circuit is broken.
 |
| resistor soldered to base |
Next you solder a 1K ohm (brown black red) resistor to the bottom pin of the trace you cut. Add some heat shrink tubing to the resistor to protect it from shorts. Then solder the other end of the resistor to the top pin of the trace you cut. Put everything back together and you are done. Now you can plug your radio into a computer and use your flight simulator software without unplugging the transmitter module.
 |
| completed resistor mod |
Sunday, December 18, 2011
FlySky RC Radio Reprogramming
 |
| FlySky FS-TH9X radio from hobbypartz.com |
I needed a multi-channel radio controller for a drone project I am working on. Multi-channel radios are expensive, over $600 for something that fit my needs. Since I am on a tight budget for this project, I started looking for an alternative. After some research on the web I found the Turnigy 9X radio. It is a cheap Chinese knock-off of a much more expensive radio. All of the reviews I read suggested that this radio is an incredible value offering the capabilities of a $600 radio for under $100 (as long as the one you get works, apparently duds are not uncommon). So I ordered one only to find out it was on back-order for 2-3 weeks. In addition to the tight budget, I am on a very short deadline and couldn't wait for the backorder to be filled. So I canceled that order and ordered another one off of eBay. Found out after I completed the "buy it now" option and paid for expedited shipping, that the eBay seller didn't have any in stock either. So I canceled that order. I was starting to panic because I needed a radio and there were none to be found, at least not in my price range. After some more reading on web I learned that the Turnigy 9X is the exact same radio as the FlySky FS-TH9X, IMax 9x, and the Eurgle 9X. I finally found the FlySky branded radio available at HobbyPartz.com, paid for rush shipping, and had the radio in hand a few days later.
 |
| add-on board from smartieparts.com |
Despite the capable hardware of these radios, the software leaves a lot to be desired. Luckily there is a huge online community of support for this radio. One of the most common modifications to these radios is to reflash the memory with updated firmware. The new firmware fixes a number of bugs in the original software and increases the capabilities of the radio. There are a few different methods for modifying the radio so that it can be reprogrammed. I chose the add-on board from smartieparts. The board is a simple screw-on circuit board that not only provides a usb port to allow you to easily upload new firmware onto your radio, but it also adds a backlight to the LCD screen for easier viewing. I ordered the smartieparts board at the same time as the radio and had it in hand in a few days.
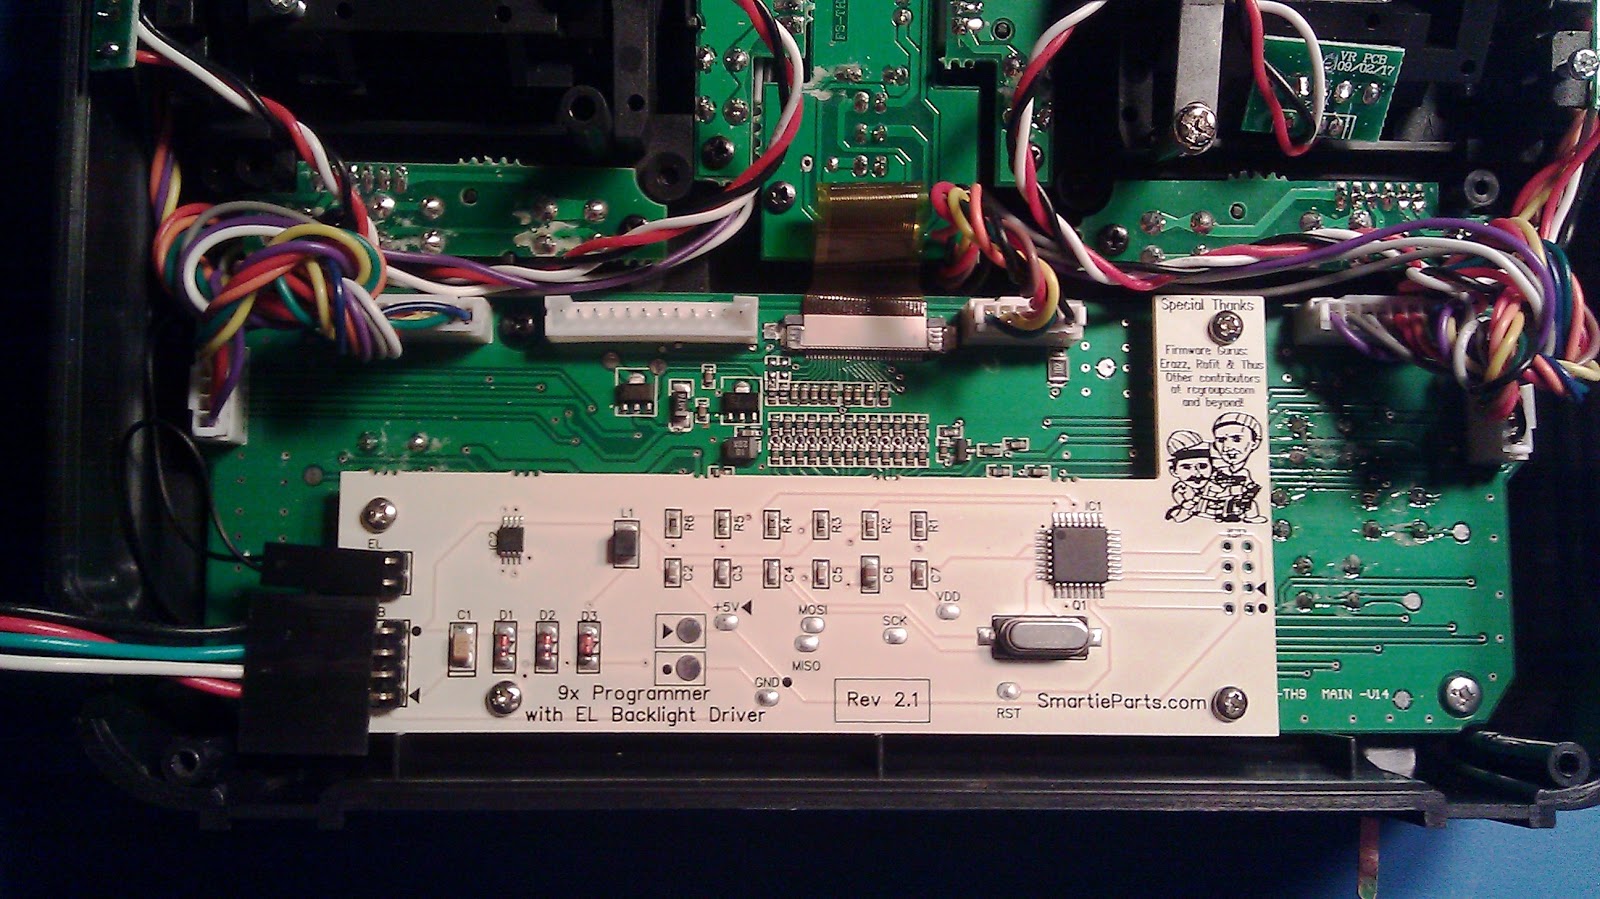 |
| smartieparts board installed |
Installation was super easy following the instructions on the website. Basically open up the radio, remove a few screws, screw in the new board, and slap everything back together. You then download whichever firmware version you choose, download the eeprom editor software and the usbasp driver to your computer and you are ready to reprogram your radio. So I do all of that, plug my radio into my computer, upload the new firmware and...nothing. The editor software gave me an error message stating it couldn't communicate with the radio. Crap! I couldn't have screwed up the installation of the smartieparts board because it really is foolproof. I tried several times, reinstalled all of the software and drivers, even tried a different computer, still nothing. Finally I vaguely remembered something on the smartieparts website about hardware versions. Turns out there are two versions of the radio hardware. The older version has one of the circuit board contact pads in the wrong location. The newer radios have the contact pad in the correct location. With the older hardware, the pogo pin on the smartieparts board does not make contact with the required circuit trace and cannot program the radio. I just assumed that since I had a brand new radio that I just ordered, it must be the most recent version of the hardware. Oops! After looking inside the radio, I realized that I indeed had the older version of the hardware.
 |
| incorrect location of contact pad |
The recommended fix is to solder a wire from the correct circuit trace on the radio directly to the smartieparts board. Well first of all that means that the board will be semi-permanently attached to the radio. And it also requires soldering to some very small surface mount components on the radio circuit board. I am a pretty experienced solderer and I have some very good equipment, and even I was skeptical about my chances of success at that job. I figured there must be a better way. I decided to try to put a contact pad in the correct location on the radio circuit board so that the smartieparts board could simply be screwed in and work as intended.
I started by cutting through the original contact pad with an X-Acto knife and a jewelers loupe to disconnect it from the wrong trace. I had to use one of the thicker X-Acto blades as the thinner blades wobbled too much and risked slipping and damaging the board. After I cut through the pad I checked with a multimeter to make sure there was no electrical contact with the old trace. Next I used the X-Acto to carefully scrape the protective covering off of the correct trace so I could solder to it.
 |
| old pad cut and correct trace ready for solder |
I tried to bridge some solder between the old contact and the propper trace. No luck. I needed some copper to bridge the gap. So I cut some copper foil off of a scrap circut board I had with a chisel blade and cut it down to size.
 |
| copper foil cut as new contact pad |
 |
| new contact pad - not pretty but it worked |
Success! The software indicated the new firmware was loading. When it was done, my radio screen flashed to life with the new firmware logo. I was able to get the smartieparts board to work with version 1 hardware without soldering it directly to the radio. Now my radio has total flexibility. I can add any of dozens of firmware versions and update the radio at any time. I can also configure the radio controls from my computer without having to go through all of the menus on the radio screen. For a total investment of under $150, I now have a radio with the capabilities of one costing 4 times as much.
 |
| firmware successfully loaded |
 |
| new firmware start up screen, backlight works too! |
I am really starting to like this radio. Just a few more tweaks and it will be ready to go. One slight annoyance with this radio is it will not work with simulator software unless you unplug the TX module. Not a big deal but it is slightly inconvenient. Adding a resistor will correct this. And unfortunately when you unplug the TX module, it is still stuck to the radio because it is hard wired to the antenna. I am going to move the antenna from the radio to the TX module to fix that problem as well. Click here for the resistor mod. Click here for the antenna mod. I also relocated the USB port from the smartieparts board to the side of the radio case. Check that out here.
Sunday, December 11, 2011
Stupid Sock Creature
 |
| "Monkey Boy" I and II |
Yes, real men can sew. I was looking for something to make for my oldest daughter for her second birthday in 2006. I came across Stupid Sock Creatures in the bookstore. Great book. It explains how to make odd looking stuffed animals out of socks. Not only does it include patterns but it also goes into general construction techniques so you can make up your own creature. Intended for beginners, the book is very thorough and assumes you know nothing about sewing. I hadn't touched a needle and thread for over a decade and I had no problem knocking one out in an evening.
I chose "Wronky" from the book for the first one (pink). I followed the directions almost word for word. He turned out great but I think he's a little under stuffed. I may need to perform a little surgery soon. I gave him to my daughter and she immediately named him Monkey Boy. Last June I made the second one (black and pink) for my youngest daughter's third birthday based on "Owlsley" from the book. This time I changed up the pattern a little making the legs shorter, the arms longer, eliminating the tag and making it a cyclops. Following her sister's lead, she also named it Monkey Boy.
The hardest part is finding the right socks. Most socks are truly boring. And when you find interesting socks, they are often too thin or too soft to make good stuffed animals. Ideally you want heavy cotton or wool socks with a nice pattern to them. Your best bet is to go to a dedicated sock store; I had a tough time finding what I was looking for in department stores. "Monkey Boy I" is made out of a pair of super soft fuzzy socks. Unfortunately the fabric doesn't hold stitches too well and he has had to make a few trips to the stuffed animal hospital. "Monkey Boy II" is made from tougher socks but they are a little on the thin side. Time will tell how he holds up. This was a quick and easy project. Both Monkey Boys hold a place of honor among their favorite stuffed animals. Check out the Stupid Creatures website for more ideas.
Sunday, December 4, 2011
Shotgun Repair
 |
| Spanish side by side .410 |
Time for some gunsmithing! A couple of weeks ago my buddy called me asking if I knew of any good gunsmiths in the area. He had a .410 side by side shotgun with a broken safety. When you loaded and cocked the gun, the safety would automatically set but only for one trigger. The other trigger was ready to fire and could not be put on safe. Unfortunately I didn't know any gunsmiths but I have a a fairly complete set of gunsmithing tools and I have done some firearm repairs before, so I offered to take a look at it.

The shotgun turned out to be a mystery. It was labeled "Jana-Denver, CO" but also said "Made in Spain"? A little searching on the web (especially at Shotgunworld.com) told me that Jana was an importer, now long out of business. They imported shotguns from a variety of manufacturers. But who made this one? It looked to be a pretty decent shotgun with lots of hand engraving on the metal, a color case hardened finish, and a nice walnut stock. Researching some proof marks on the barrel indicated that it was most likely made by Loyola. That wasn't much help since I couldn't find any information on Loyola shotguns or any parts diagrams. I've never been inside a shotgun before so I wasn't sure how I was going to disassemble this thing, let alone repair it without a decent parts diagram. I convinced myself "How hard could it be?" and started the disassembly.
 |
| hand engraving under the action |
Well, it turns out it was harder than I thought. No matter which screws I removed, I could not get the action out of the stock. Dejected, I put the shotgun aside. A day or two later I awoke at 3:00 AM and could not get back to sleep. The shotgun was haunting me. Refusing to admit defeat, I crawled down to the basement for a second attempt. I found the answer by accident. As I was manipulating the action the trigger guard moved. For a second, I thought I had broken the weld on the trigger guard. Then I realized the end of the trigger guard was actually threaded into the action. I spun the trigger guard off, removed one more screw that was hidden under the trigger guard, and voila! The action came apart and off the stock.
 |
| the mysterious threaded trigger guard |
The safety problem was ridiculously simple. Each trigger is a lever. The safety is simply a bar that slides over the top of the levers to block any upward movement. The bar is a screw. Somehow the screw had backed itself out and was only blocking one trigger lever. I pulled out the screw, cleaned it, and screwed it back in with a little Loctite until it blocked both levers. So about 2 hours of work trying to get the action off, and 2 minutes to fix the broken safety.
 |
| safety screw |
 |
| safe and fire positions over the triggers |
With that problem solved, I noticed the recoil pad was dry rotted and starting to crumble. I needed more of a challenge since the safety problem was too easy of a fix. So with an OK from my buddy I figured I would attempt to fit my first recoil pad. Obviously I couldn't order a direct replacement for this uncommon shotgun. I measured the original recoil pad and looked for a replacement. The stock is relatively small and narrow so I ordered the smallest recoil pad I could find from Pachmayr. The website had a pretty good set of instructions on how to properly fit their pads. It sounded like something I could handle.
 |
| original rotten recoil pad |
First I carefully removed the old pad. That was no simple task as the screws were hidden beneath the pad and it was glued on as well. Luckily I managed to get the old one off without damaging the stock. Next, I filled the old screw holes. I drilled them out a little, glued bamboo skewers in the holes, and cut them flush. To prep the recoil pad for screws, I used a transfer punch inserted from the back of the pad to make a dimple in the center of the screw hole on the face of the pad. I used an x-acto knife to carefully slice between the horizontal ridges on the face of the pad where the dimple was, and pushed the punch through. I oiled the screws before inserting them into the pad. The screws disappeared beneath the pad without a trace. Then I carefully lined up the pad, marked the locations for the new holes, and drilled.
 |
| old screw holes filled |
 |
| new holes drilled |
Next I temporarily attached the recoil pad and scribed the outline of the stock on the back of the pad with an x-acto knife. There was a fair amount of extra material and I doubted if I could take it down to size without it looking like I butchered it.
 |
| pad marked for grinding |
Then I removed the pad and sanded off the bulk of the material on my stationary belt sander with an 80 grit belt. The brown part of the pad looked and smelled a lot like pencil erasers as I ground it down. Next I used 120 grit paper on my stationary disk sander to take the pad just shy of the stock marks. The grinding went fairly quickly and I noticed the finish on the pad looked pretty good after a pass with the 120 grit. I was feeling pretty confident at this point.
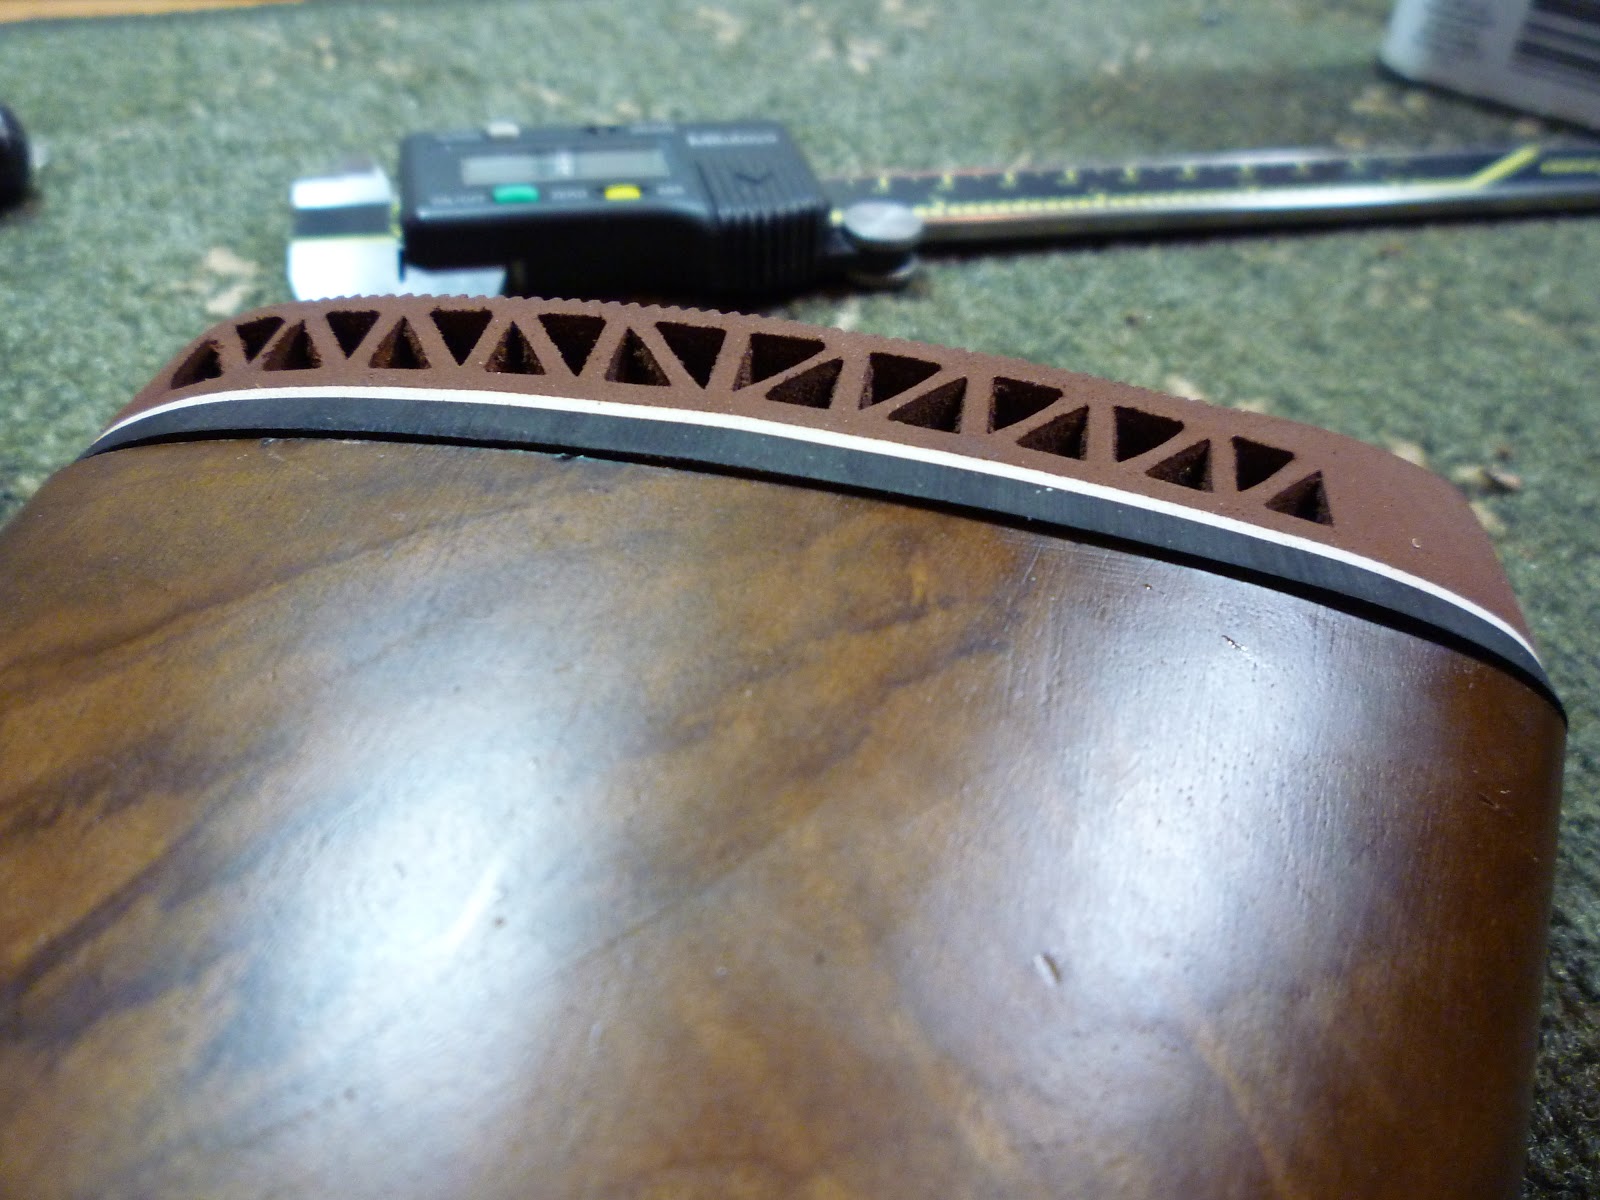 |
| after rough grinding |
I screwed the pad back on to the stock for the last time. Then I wrapped the end of the stock in a layer of painters tape to protect the finish. I had maybe 1/32" of material left to remove. I hand sanded with 150 grit paper wrapped around a block of aluminum until I started to sand the tape. Finally, I finished up with 320 grit wet/dry paper lubricated with a few drops of kerosene. One last wipe with kerosene to clean the pad and I was done.
 |
| after final hand sanding |

My one mistake was not following the angle of the stock on the toe of the recoil pad. I squared mine off. It doesn't look bad, I just think and angled toe would have looked more professional. Oh well, live and learn. Overall I am extremely happy with the results. Much easier than I expected and you really can't tell that I ground the pad down. It looks as if it was made that size from the start. I actually impressed myself with this job!
 |
| look ma, no screws! |
 |
| a job well done |
Saturday, December 3, 2011
Machine Bench

I needed a very sturdy bench to mount my mill. I could buy one but they are expensive and not heavy enough. So I built this one in September 2011. The legs are concrete block. Each block is cemented together and the hollows in the block are filled solid with concrete. I sunk two pieces of rebar into each leg to help hold everything together. I left the rebar sticking out of the top of the blocks. The top is a 1/2" x 24" x 36" steel plate left behind by a road crew. I progressively drilled four holes in the top to coincide with the rebar in the legs. I set the top over the rebar and welded the top to the rebar to make everything one solid piece. I cut and ground the rebar flush and bolted my mill to the top. I built an identical bench for my lathe. The benches are rock solid. I never have to worry about vibration. All pieces were found for free, the only thing I paid for was the concrete mix. Now I just need to find a good industrial epoxy paint to cover the top.

Subscribe to:
Posts (Atom)