Showing posts with label metalworking. Show all posts

Monday, November 25, 2013

Aluminum Pen

my aluminum Bic pen

I've got a thing for metal pens.  I've been planning on making my own but I haven't settled on a design yet.  So I have been collecting any decent metal pens that I can find.  Kickstarter is chock full of nice pen projects.  I've backed a few and been generally pleased.  One that I missed was the Baux Pen.  So simple, it's elegant.  It's nothing more than an aluminum tube machined to fit Bic pen parts.  Very cool idea.

the Baux Pen, my inspiration

Not too long ago, I posted about some landing gear I assembled for my hexacopter.  Turns out those landing legs weren't so great so I took them off and swapped them for a different design.  As I did that, I noticed the aluminum tubes on the bottom of the landing legs looked to be just the right diameter for a pen.  I checked with a Bic pen I had on hand and the outside diameters were almost identical.

drilling inside diameter

First I cut the tube to rough length.  Then I chucked the tube in my lathe and opened the inside diameter of the tip end with a letter G drill bit to a depth of 1/2".  Then I turned the tube around and parted off the other end to the correct length.  Drilled that end with a letter E drill bit.  The end plug is a bit more narrow than the tip.

parting off

Only thing left was to add a few grooves for a better grip and some visual appeal.  I used a 60 degree insert and spaced the end rings 0.020" apart and 0.010" deep.  At the tip I made the grooves 0.030" apart and 0.010" deep.  I was going to polish the tube but I really like the shine of the grooves against the bead blasted finish of the tube.

groovy

The Baux Pen must use tubing with a larger diameter than a Bic pen to achieve the step-down look at either end.  It gives the pen a much more interesting look than the straight sides of my pen.  But I used what I had on hand at the time.  Overall not bad for about 20 minutes work.  The metal body feels better than plastic and balances better when writing.  I may have to do this again in stainless steel.

Tuesday, June 4, 2013

Hammerli 850 Trigger Upgrade

Original plastic trigger on left, new metal trigger on right.

Here is a project I did back in June 2008.  One of my favorite airguns is the Hammerli 850 AirMagnum.  It is a .22 caliber CO2 powered bolt action air rifle.  It holds 8 pellets in a rotary clip, has good power, and it relatively accurate.  Best of all, it is powered by an Airsource cylinder and can get around 200 shots per cylinder.


Hammerli 850 AirMagnum

While plastic stocks do not bother me, plastic triggers do.  I don't know why, it just makes the whole gun feel cheap.  So I decided to make a metal replacement trigger.  Not much to show for the build pictures. I just started with a piece of metal that was the right thickness, scribed the outline of the original trigger on it, and carefully ground, cut, milled, and filed, away the excess material down to the scribe marks.  I finished it up by polishing it with some emery paper followed by the buffing wheel on my Dremel.

left side

right side

front view (notice narrower profile of new trigger)

after bluing

I narrowed the trigger a bit to my liking.  After sanding and polishing I blued the trigger with some Berchwood Casey Perma Blue.  The new trigger works great and feels even better.

Sunday, May 20, 2012

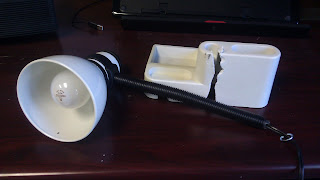
Magnetic Shop Light

finished light

I still haven't set up the lighting in my shop.  So I needed a small spot light that I could mount to my mill and/or lathe to provide extra light when needed.  I had all the parts lying around; total cost $0.00.  This was a pretty simple project so I'll let the pictures do the talking.

rescued from the trash
the parts; lamp and Harbor Freight magnet

gently coaxed from the base and disassembled, had to desolder
the wire from the light socket
epoxied piece of threaded tube from old pedestal lamp into neck
milled hole in neck for power cord

drilled magnet to fit over rod and fastened it in place
reassembled
finished product in action

The light works great.  The magnet is ridiculously strong; it's not coming off until you want it to.  Now I can actually see what I'm doing.

Saturday, December 3, 2011

Machine Bench


I needed a very sturdy bench to mount my mill.  I could buy one but they are expensive and not heavy enough.  So I built this one in September 2011.  The legs are concrete block.  Each block is cemented together and the hollows in the block are filled solid with concrete.  I sunk two pieces of rebar into each leg to help hold everything together.  I left the rebar sticking out of the top of the blocks.  The top is a 1/2" x 24" x 36" steel plate left behind by a road crew.  I progressively drilled four holes in the top to coincide with the rebar in the legs.  I set the top over the rebar and welded the top to the rebar to make everything one solid piece.  I cut and ground the rebar flush and bolted my mill to the top.  I built an identical bench for my lathe.  The benches are rock solid.  I never have to worry about vibration.  All pieces were found for free, the only thing I paid for was the concrete mix.  Now I just need to find a good industrial epoxy paint to cover the top.