Showing posts with label paracord. Show all posts

Thursday, December 19, 2013

Paracord Cobra Bracelet

cobra pattern paracord bracelet

After making my paracord pouch, I realized that my 9 year old daughter would really enjoy making things with paracord.  I figured a bracelet would be the perfect beginner project.  Easy to do and what young girl doesn't love bracelets?  So I picked out some colors of paracord that I thought she would like and some small buckles at Michaels.  I showed her the first weave and then she took over.  In no time she was weaving the paracord like a pro.  Here's how we did it.


First cut 4 feet of each color of cord.  Then fuse the two pieces of cord together by melting the ends.


Loop one end through one of the buckles.


String the cord through the other buckle and wrap the cords around your wrist to measure.  Tie the buckle to the cords with overhand knots.


Ready to weave.

She wanted purple down the middle with pink lines down the sides.  Whatever color you want down the middle is the color you start with each time.


The purple cord is laid across the bracelet.


The pink cord goes over the purple, behind the bracelet, and through the loop from the back.


Pull the cords tight.


after several passes
Continue, repeating the same sequence each time.  Purple over the front of the bracelet, pink under the bracelet.


Repeat until you reach the other buckle.


To finish just trim the ends leaving about 1/8".  Then melt the ends with a lighter and use the metal part of the lighter to push the melted cord against the bracelet.  This mushrooms the end of the cord and melts it to the surrounding cord so that it can't pull through.  That's it.  Enjoy your new bracelet.

Saturday, December 14, 2013

Paracord Pouch

finished pouch holding 3/8" steel shot

Now that I have made a paracord needle, it's time to put it to use.  These slingshot ammo pouches were what first inspired me to try some paracord projects.  A quick search on the web turned up this set of plans for a paracord pouch.  It is a slightly different design than the Simple Shot pouches but it should work.

Start with 30 feet of paracord.  Use a rubber band or tape to secure one end of paracord to can.  Also secure a sharpie to can to add slack to line.  (I used a pen but found it a bit tight afterwards.  The sharpie will give more slack.)  Wrap the cord around a soda can 25 times and remove the sharpie.

25 wraps of paracord

Add your needle to the end of the paracord and weave it up through the wraps by twos.  Start by going under the first two wraps.  Continue spacing each line about 1/2" apart.  Don't worry too much about spacing, just push the lines together, you can feel when they are close enough.

starting to weave

and more

Make sure to work any twists and kinks out of the paracord as you go.  Your last weave should go down and thread back under the bottom wrap.

last weave

Now it is time to start on the bottom.  Push everything down even with the bottom of the can.  The bottom is constructed by making half hitches around the bottom of the weave.  Alternate the half hitches through the horizontal wraps and through the base of the vertical weaves.

starting first half hitch

finishing first half hitch

first row of half hitches complete

Continue the half hitches around the base of the can.  Keep the hitches tight so you have a solid base.  As you get towards the center you have to skip some half hitches and maybe go every other one.  Otherwise you end up making the base cone-shaped rather than flat.  If there is an exact formula for this, I'm not aware of it.  The center gets a little tricky and I just went by feel, adding half hitches where it looked like I needed one.

completed base

Now remove the pouch from the can.  To finish the base, I passed the working end inside the pouch.  Then I secured it to the base with an overhand knot and cut off the excess.  I inverted the pouch and finished it off by melting the knot together, permanently securing it.

inside view of melted knot

The starting end of the cord is then woven back down the side of the pouch next to one of the other vertical lines.  Melt that end and press it to the adjacent line, fusing them together.  Take the extra cord (or cut a new piece) and weave it around the top to create a drawstring (see first picture).  Add a cord lock then knot, trim, and melt the ends of the drawstring.  All done!  Add your favorite junk and pull it closed.

finished pouch


Thursday, December 12, 2013

Homemade Paracord Needles

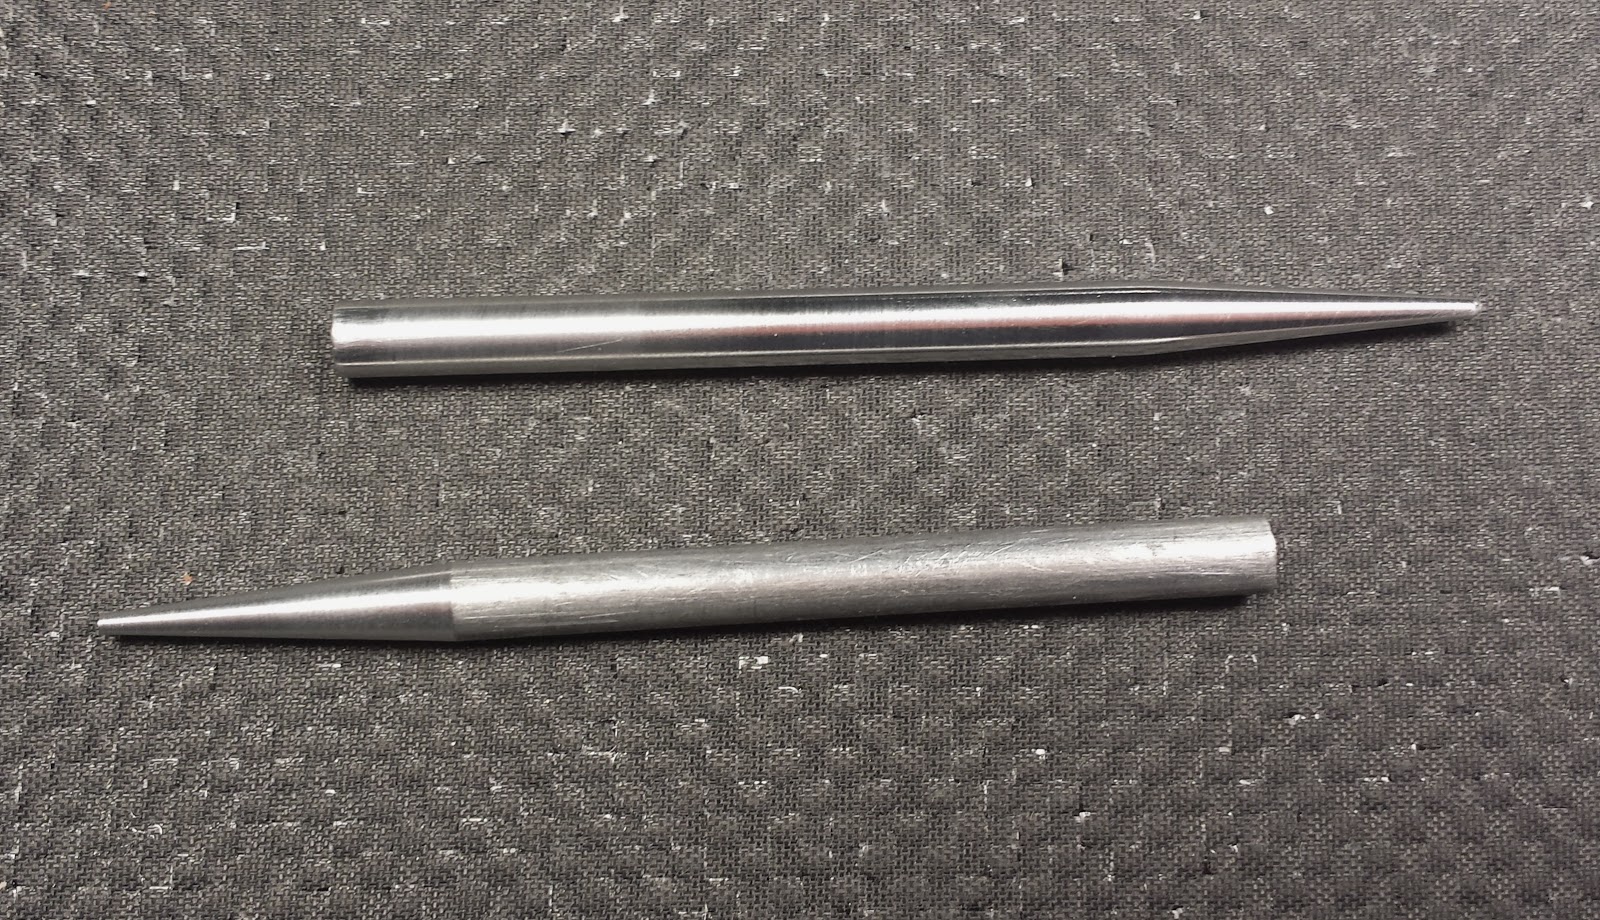
my homemade paracord needles


Listen.  I love Rainbow Loom as much as the next guy but I fear if I make too many more rubber band bracelets with my daughters, I may have to trade in my Man Card.  So I decided to try my hand at some paracord projects.  Seems like something the girls and I might like to do together.  For some of the trickier projects, people use Perma-Lok needles to weave the rope through tight spots.  It's just a tapered metal rod with a threaded hole in the base that you screw the paracord into.  The threads actually hold the cord tight as you pull it.  I'd never forgive myself if I purchased something that I could make so easily, so here we go.

paracord and cleaning rods

I could have made them from some metal rod but I figured if I looked hard enough in the abyss that is my basement, I would find something already threaded.  I remembered that I had a bunch of cheapo pistol cleaning rods that I had saved.  I have upgraded to more professional rods and have no need for these anymore.  They are 13/64" in diameter and have a 8-32 thread on the end that goes 7/16" deep.  They looked just about right so I screwed a length of paracord in and pulled on it.  It held tight.  Perfect.  All I would need to do is cut them to length and taper the end.  I decided to make two, one for me and one for my daughter.

8-32 thread

I cut the rods to 3" in length with a hacksaw.  Then I started to taper the ends on my disc sander.  The results were coming out too uneven for someone as obsessive as myself.  So I chucked them in my lathe and cut a 5 degree taper.

cut to length

Next, I blunted the tips with a hand file.  I finished them off with some fine emery paper followed by 0000 steel wool while still spinning in the lathe.

tapered and (top one) polished

That's it.  It probably took me longer to find the cleaning rods than to make the needles.  I have some more scrap cleaning rods in other materials and diameters.  I'll probably make a few more in different lengths and tapers just to see what works best for me.